How to fix when my iPhone will not turn on or charge?
Why is my iPhone not turning on? – The causes and how to fix them.
Why is my iPhone not turning on or why won’t my iPhone turn on is not an uncommon issue often reported by Apple device users. When you see your iPhone does not turn on or charge, your device might have a frozen screen/black screen that doesn’t respond when you touch it or press the buttons.
You need not worry much if you see your iPhone is not turning on or charging because if there is some system glitch or corrupted firmware, your iPhone won’t power on or charge. In this article, I will explain the possible causes of the issue and show how to fix them when your iPhone won’t turn on or charge.
Before I go into the possible solutions to the problem let’s first look into the probable causes when iPhone users make the query – why will my iPhone not turn on or charge?
Why is my iPhone not turning on – here are the possible causes
Why my iPhone is not turning on is a query you may sometimes hear from iPhone users. Recently I met one iPhone 6 user asking why my iPhone will not turn on or charge. To answer the users’ question of why my iPhone won’t power on, I have given below some of the possible reasons why sometimes you may find your iPhone does not turn on:
- Software crash;
- The battery drained out completely;
- Corrupted firmware;
- Water damage;
- Hardware problem;
Software glitches and update issues
A software glitch can indeed prevent your iPhone from turning on or cause it to freeze on the Apple logo during startup. This problem is often triggered after installing a new iOS version or updating certain apps. Sometimes, the device may get stuck in a boot loop or refuse to move past the logo screen altogether.
These hiccups usually crop up when the update process is interrupted, the firmware download is incomplete, or incompatible apps clash with the latest iOS changes. If you notice that your iPhone becomes unresponsive right after an update, a forced restart or connecting the device to a computer for a system restore via iTunes or Finder may help resolve the issue. Regularly backing up your iPhone can also protect your data in case of such unexpected glitches.
Overheating is another reason why your iPhone might suddenly refuse to turn on or respond. Apple built a safeguard into iPhones that automatically powers down the device when it gets too hot, preventing permanent damage to its internal components. This can happen if you leave your phone in direct sunlight, use it heavily for gaming or streaming for an extended period, or charge it in a spot with poor airflow—think about that afternoon when you accidentally left your iPhone on the car dashboard or took it into a sauna at the gym.
If your iPhone is too hot and displays a temperature warning or becomes unresponsive, here’s what you should do:
- Power off the device right away.
- Move your iPhone to a cooler place, away from heat or direct sunshine.
- Wait until it returns to normal temperature before trying to turn it back on.
To help prevent overheating in the future:
- Keep your iPhone out of hot cars, saunas, or any area above 113°F (45°C).
- Avoid covering your iPhone while charging—it needs to dissipate heat.
- Give your phone a break during intense activities like gaming or video recording in warm environments.
Taking these steps can help you avoid unexpected shutdowns due to overheating and keep your iPhone working as it should.
Can malware make my iPhone not turn on?
Although many people believe iPhones are immune to malware, the reality is that sophisticated threats can still find their way onto your device—especially if you’ve downloaded untrusted apps or clicked suspicious links. Malware can affect your iPhone in a few surprisingly impactful ways, including slow performance, frequent crashes, and in rare cases, stopping the phone from turning on altogether.
How does this happen? Malicious software can interfere with essential system processes, drain your iPhone’s battery abnormally fast, or corrupt critical files—sometimes causing boot-up failures that leave you staring at a black screen. For example, certain trojans or spyware might run hidden background tasks, making your phone overheat, become unresponsive, or stuck in a startup loop.
To minimize your risk:
- Only install apps from the official App Store.
- Be cautious clicking links in texts or emails from unknown senders.
- Keep your iOS updated to benefit from the latest security patches.
While true malware-related shutdowns are rare, staying vigilant is key to protecting your device’s performance—and making sure it powers on when you need it.
Can jailbreaking prevent my iPhone from turning on?
Jailbreaking might sound appealing if you’re eager to customize your iPhone beyond Apple’s limits, but it comes with some hidden dangers—especially affecting performance and reliability. When you jailbreak your device, you’re essentially opening the door to install apps and tweaks Apple hasn’t approved, but this freedom also strips away many built-in security protections.
Here’s how that can lead to trouble:
- Without Apple’s official iOS updates, your phone is left exposed to various vulnerabilities that can sneak in via untrusted apps and tweaks.
- Some modifications may conflict with core system functions, resulting in instability, frequent crashes, or sluggish performance.
- In worst-case scenarios, jailbreaking can corrupt essential system files or cause boot loops—meaning your iPhone may get stuck on the Apple logo or fail to turn on at all.
If you’ve ever noticed an iPhone that won’t power on after a deep dive into unauthorized customization, jailbreaking is often the culprit. And keep in mind, once outside Apple’s safety net, fixing these problems can be tricky and may even void your warranty.
Bottom line: While jailbreaking opens new doors, it also increases your chances of winding up with an unresponsive device, so weigh the risks carefully before taking the plunge.
What to do when my iPhone won’t turn on or charge?
What should be done if my iPhone that won’t turn on or respond when I touch it or if it is stuck on the Apple logo when turned on?
Now that you know the causes of your query- why is my iPhone not turning on, you may try the following fixes to make your iPhone boot again and work as it should unless your device has a hardware problem. All these fixes are found to be effective for all versions of the iPhone that won’t turn on.
1. Restart your iPhone
When you see your iPhone does not switch on or charge for any reason first, try to restart the phone. To do this,
Press and keep holding down the Sleep/Wake button (Power button) at the top right corner or the right edge of your phone until the red slider appears on the screen. Slide it across to turn your iPhone off. Then restart your phone again by holding down the Sleep/Wake button for a few seconds.
2. Force restart your iPhone
If your iPhone does not switch on even after trying the above standard restart process try to force the device to restart. Forcing your device to restart won’t erase the content currently on it. Here is what you need to do to force restart your iPhone:
- For iPhone 8 or later: Press and quickly release the volume up button, press and quickly release the volume down button, then press and hold the side button. Release the button when you see the Apple logo;
- For iPhone 7 or 7 plus: Press and hold the Top (or side) button and the Volume Down button until you see the Apple logo;
- For iPhone 6s or earlier: Press and hold the Sleep/Wake button and the Home button at the same time until you see the Apple logo;
If you’re using an iPhone with Face ID, this process might take a little longer than usual—sometimes holding the side button for more than 10 seconds is necessary before the Apple logo appears. Don’t panic if you don’t see it right away.
If your iPhone doesn’t turn on after this force restart, plug it into a charger and let it charge for at least one hour. Sometimes a deeply drained battery can prevent your phone from starting up, and it may take a while before anything appears on the screen.
If your phone shows a low-charge battery icon, keep it connected and continue charging for at least 30 minutes, or until it powers on normally. If you still don’t see any signs of life after charging and a force restart, move on to the next troubleshooting step.
3. Check the USB cable and power adapter
If ‘force restart’ doesn’t work and if your iPhone won’t switch on even after this, the next thing you should do is, check the power adapter and the USB cable. An iPhone, iPad, or iPod Touch may fail to turn on if it’s battery is not charged enough to run it.
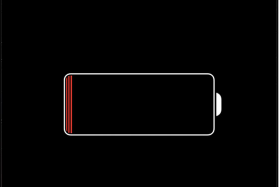
Generally, if there is not enough battery power, the iPhone displays the low-battery image and becomes unresponsive when you try to turn the device on. But, when the battery is completely dead, it won’t respond and you’ll see a black screen. In such a situation, your iPhone will not turn on until you let it charge for a while. Therefore, plug in your device and let it charge for up to one hour. You should see the charging screen a few minutes after you plug in the phone. For stubborn cases, make sure to charge your iPhone for at least 30 minutes or until it starts—sometimes a trickle of power isn’t enough to wake it up right away.
If your iPhone’s screen is black but it’s charging, you should notice a charging icon (a lightning bolt) on the screen after a few minutes of being plugged in. Sometimes you may also see the battery icon with a charging symbol, confirming that the phone is taking power.
If you don’t see the charging screen within an hour, or you see the ‘connect to power’ screen, your power adapter or cable may be faulty. Check the USB cable, jack, and power adapter, and ensure that everything is plugged in firmly. If your iPhone won’t charge even after this, there are a couple of things you may try:
- Try another USB cable;
- Try another power adapter;
- Try another wall outlet;
- Connect your device to your computer instead of using a wall charger;
- Clean the charging port to remove dirt, debris, or dust;
Taking these steps helps rule out issues with your charging accessories and ensures your device is actually getting the power it needs before moving on to more advanced troubleshooting.
4. Check if your iPhone battery needs replacing
If you’ve tried different cables, chargers, and power outlets and your iPhone still refuses to power up or hold a charge, the battery itself might be the culprit. Thankfully, Apple makes it straightforward to check your battery’s health.
Simply open the Settings app on your iPhone and scroll down to Battery. Next, tap on Battery Health & Charging. Here, you’ll see a field called Maximum Capacity. If this number has dipped much below 80%, or if you see a message suggesting “Service” or “Battery health degraded,” it likely means your battery is worn out and should be replaced.
If you’re still unsure, Apple Stores and many authorized repair shops can run a quick diagnostic for you. Keeping an eye on your battery health not only helps your iPhone turn on reliably but also ensures it lasts throughout the day without unexpected shutdowns.
5. Put the iPhone into DFU mode
A DFU restore stands the best chance of fixing a problem with your iPhone when a reset or standard Recovery mode fails to solve it. DFU mode can fix several issues with your iPhone including why the iPhone is not turning on. Particularly when you suspect that firmware updates or faulty jail-breaking of the device may be the cause of the problem, you may choose to put your iPhone into DFU mode.
It’s worth noting that jailbreaking an iPhone removes software restrictions set by Apple and grants root access to your device. While this can offer some customization benefits, it also exposes your iPhone to increased security risks. A jailbroken device is more vulnerable to malware, viruses, and software instability, and you’ll likely miss out on critical iOS updates that keep your phone running smoothly and securely. If you’ve previously jailbroken your iPhone or attempted to modify its firmware, DFU mode is especially helpful, as it allows the device to be completely restored to its original state, potentially resolving deeper system issues that standard troubleshooting steps can’t fix.
To put your iPhone into DFU mode (for iPhone 8 or later models) follow these steps:
1. Press and release the volume up button quickly;
2. Press and release the volume down button quickly;
3. Press and hold the side button until the screen goes black;
4. Once the screen turns black while continuing to hold the Side button press and hold the volume down button;
5. Next release the Side button after 5 seconds while continuing to hold the volume down button until your iPhone shows up in iTunes;
6. As soon as your iPhone appears in iTunes, release the volume button;
7. Your iPhone is now in DFU mode;
8. Now restore your iPhone using iTunes;
To Exit DFU Mode hold the Home and Side button (power button) until the Apple Logo appears. Press the Side button to reboot the device. After the device reboots, your phone should be back to its normal functions;
6. Restore your iPhone to factory settings
If you still see your iPhone won’t switch on your best bet would be to restore your iPhone to its factory settings, which can solve many problems. This would erase all the data and settings on your phone. Therefore, make sure to back up all your data first before going for the Restore process. If you haven’t synced your device recently, do so now to make sure all your data is up to date.
Normally, you’d sync your iPhone and restore it to factory settings using iTunes. To do this, connect your device to your computer and launch iTunes. But before connecting the device and launching iTunes, ensure you have the latest version of the iTunes software installed. Next, open iTunes on your computer and connect your iPhone to your PC or Mac with the supplied USB cable. Then, unlock your device with your PIN and tap the Trust button to trust your computer when asked for. Select your iPhone when it appears in iTunes and click the Restore button. iTunes will restore your device to its factory settings with a clean copy of the iOS operating system.
Important: If simply restoring hasn’t worked, you may need to repeat these steps, but this time tap Restore in step 3 of the process. Be aware that restoring your iPhone will wipe all user data and revert it to factory settings—so this should be a last resort if nothing else has worked.
It is however vital to note that regardless of whether you use DFU mode or recovery mode, all your un-synced data since your last iTunes backup, will be lost. Therefore, you are advised to backup any un-synced data.
Risks and Consequences of Restoring to Factory Settings
Restoring your iPhone to factory settings is a serious step with important consequences. When you restore your device, everything on your iPhone—including apps, photos, messages, contacts, settings, and personal data—is completely erased. Your phone will return to its original “out of the box” state, running a fresh copy of iOS as if you’d just purchased it from the Apple Store.
This means:
- Permanent Data Loss: All information that hasn’t been backed up to iCloud, iTunes, or another backup service will be lost and cannot be recovered.
- Reinstallation Required: You’ll need to reinstall your apps and reconfigure preferences, Wi-Fi passwords, and any custom settings from scratch.
- Logins and Authentication: Accounts such as Gmail, WhatsApp, or banking apps will need to be re-authenticated after the restore.
- Unlinked Devices: Any paired devices (like your Apple Watch or Bluetooth accessories) will be disconnected and need to be set up again.
Because of these implications, restoring to factory settings should only be considered after all other troubleshooting options have failed—especially if you don’t have a recent backup on hand. Always double-check that your important data is safely stored before taking this step.
What should I do if my iPhone is stuck blinking the Apple logo and won’t turn on?
A blinking Apple logo that refuses to go away is often a sign that something’s gone sideways with your iPhone’s software—think incomplete updates, muddled data, or even a failed jailbreak. The good news? There are a few steps you can try to get your iPhone back on track.
Start with a force restart. For most iPhone models, this means pressing and quickly releasing the volume up button, then the volume down button, and finally pressing and holding the side button until you see the Apple logo disappear and (hopefully) reappear as your phone boots up normally.
If your iPhone remains stubbornly stuck, you’ll want to try recovery mode:
Try Recovery Mode
- Plug your iPhone into your computer. On a Mac, open Finder; on a PC, open iTunes or the Apple Devices app (make sure it’s updated to the latest version).
- Press and release the volume up button, then the volume down button, and finally press and hold the side/power button until you see the Connect to computer screen.
- When a prompt appears on your computer, choose Update to attempt to reinstall the operating system without erasing your data.
If that doesn’t do the trick, repeat the steps above but this time choose Restore in step 3. Just a heads-up: restoring will wipe your device clean and revert it to factory settings, so treat this as your last resort (and hopefully you’ve got a backup stashed somewhere safe).
If your iPhone still won’t budge after all that, you’ll want to consider a Device Firmware Update (DFU) restore using iTunes or Finder, just like you would for other persistent issues. This deep restore can clear out any corrupted software and give your iPhone a fresh start. Remember though, a DFU restore will erase everything on the phone, so a recent backup is always your best friend here.
If none of these steps work, it may be time to reach out to Apple Support or visit an authorized repair center, as the issue could be hardware-related.
What to do if my iPhone won’t turn on or charge due to water damage?
You may sometimes find iPhone users reporting that my iPhone won’t turn on or charge after I dropped my phone accidentally in the water.
If your iPhone falls into water by accident you should avoid turning your phone on for at least 24 hours to prevent damage beyond repair. You need to dry out the phone first before turning it on. In such a situation follow the steps given in the post – I dropped iPhone in water – how can I fix iPhone water damage.
If your iPhone does not turn on or charge even after following all the fixes mentioned above, your iPhone or iPad likely has a hardware problem preventing it from booting. In such a case, you need to contact Apple support or visit one of their authorized stores.
Check for Other Signs of Physical Damage
Sometimes, the culprit behind an iPhone that won’t turn on or charge isn’t just water—it could be any sort of physical damage. Dropping your iPhone onto a hard surface, exposure to other liquids (like detergent or oil), or even a cracked screen could all cause internal components to short-circuit or connections to loosen.
Here are a few things you can check:
- Inspect the exterior: Look for visible cracks, dents, or corrosion on your phone. Don’t forget to check for moisture under the screen or around the charging port.
- Check the Liquid Contact Indicator (LCI): For water incidents, open the SIM card slot and look inside for a small sticker (the LCI). If it has changed color—usually from white to red or pink—this means your phone has been exposed to moisture.
- Remember water resistance has limits: Even the latest water-resistant iPhones aren’t invincible, especially when it comes to liquids other than water. Exposure to things like detergent, oil, or solvents can still cause damage.
When Should You Check Your iPhone’s Hardware for Problems?
So, when should you actually start worrying that the problem is more than skin deep? If your iPhone has stubbornly refused to power on even after a decent charge—say, you’ve left it plugged in for an hour with no life at all, or only the low-battery symbol flashes for a moment before fading away—it’s time to take a closer look.
Here’s how to know when a hardware check is in order:
- No response after charging: You’ve tried charging with a variety of cables and wall adapters (Anker, Aukey, Belkin, you name it), but still get nothing—no screen, no vibration, no charging icon.
- Repeated low-battery icon: The low-battery image pops up, but even after an extended charge, your phone doesn’t move past it.
- Visible signs of trouble: There are obvious signs of damage (cracks, dents, corrosion, or warping), or your SIM or headphone ports look worse for wear.
If you tick any of these boxes and your iPhone remains more brick than smartphone, it’s a good idea to move from at-home troubleshooting to a professional assessment.
If you’ve spotted signs of physical damage—like cracks, dents, or suspicious discoloration—and your iPhone still refuses to wake up, it’s time to take the next step. Head to your nearest Apple Store or an authorized service provider for a professional evaluation. The technicians can run diagnostics to check for issues such as damaged internal components or loose connections that might be preventing your phone from powering on.
Be aware that repair costs can vary depending on your device’s warranty status, whether you have AppleCare+, the model of your iPhone, and how extensive the damage is. In some cases, especially if the damage is severe, a replacement may be recommended instead of a repair. Either way, having a trained expert examine your device is the safest route—trying DIY repairs on physically damaged phones usually leads to more headaches (and sometimes, even higher bills).
What does it usually cost to fix or replace an iPhone battery, or repair physical damage?
If, after your best DIY troubleshooting, your iPhone still refuses to cooperate, you might be looking at a professional repair. Let’s talk costs—because nobody likes sticker shock.
Battery Replacement:
Head to your nearest Apple Store or authorized service provider for battery issues. If your device is still under warranty or you have AppleCare+, you might get a new battery at little to no cost—double-check your coverage details just in case. For out-of-warranty repairs, expect to pay somewhere in the range of $70 to $120, depending on your specific iPhone model. Some third-party repair shops like uBreakiFix or Best Buy can also do the job, but make sure they use genuine parts to keep your iPhone happy.
If your iPhone’s battery has degraded to the point where it no longer turns on—no matter what cable or charger you try—a professional replacement is the safest move. Avoid DIY battery swaps; it takes special tools and expertise to pop open an iPhone safely without causing further damage. Trained technicians can run diagnostics to confirm if the battery is the culprit or if something more complex is at play.
In summary: For persistent power woes, leave battery replacement to the pros. A quick visit to a reputable repair shop could be all that stands between you and a fully revived iPhone.
Repairing Physical Damage:
Physical damage—like a shattered screen, a bent frame, or a mysterious refusal to power up—can crank up repair costs. Again, AppleCare+ can help soften the blow (with service fees instead of full pricing), but if you’re paying out-of-pocket, costs will vary widely:
- Simple jobs, like screen replacements, may range from $130 to $330 depending on your iPhone model.
- More severe issues, like damaged internal components or extensive water damage, could push repair bills even higher—sometimes to the point where a replacement makes more sense than a fix.
Before agreeing to any repairs, always request a proper evaluation and an estimate so there are no surprises. And, if the damage is truly catastrophic, a professional might just let you know it’s time to consider a new device.
You may also like to read this post: iPad not turning on -5 proven easy steps to fix the issue
Frequently asked questions
Now that I have answered your query about why is my iPhone not turning on or charging, let me also address some of the related questions often asked by iPhone users.
Why isn’t my iPhone turning on and what causes the issue
When you see your iPhone is not turning on and you are not sure about ‘why my iPhone won’t power on’, in most cases, this is caused due to corrupted firmware or due to a system glitch.
Occasionally, a software bug can also prevent your iPhone from starting up properly, especially after installing a new iOS update or an app update. This might cause your device to get stuck on the Apple logo, freeze during startup, or refuse to progress to the password screen. While these glitches are rare, they’re not unheard of—and are often the result of a recent update or an interrupted installation.
If you suspect a software glitch is the culprit, don’t panic. These issues are usually fixable with a force restart or, in more persistent cases, by restoring your device using iTunes or Finder. Remember, a smooth-running iPhone depends on stable software as much as it does on healthy hardware.
Why is my iPhone charging but not turning on?
When you see your iPhone charging but not turning on some of the major causes are,
1. The iPhone needs force restart;
2. The battery is dead;
3. Dust and dirt clogging the charging port;
4. Problem with the power button;
5. Problem with the USB or lightning cable
What causes the iPhone Black Screen of death?
Normally, hardware issue or minor firmware problems causes the iPhone’s ‘black screen of death’. It can also be caused due to system failure, outdated apps, and water or physical damage.
What to do when my iPhone screen won’t turn on?
To fix the issue, press and quickly release the volume-up button. Next, press and quickly release the volume down button. Now, press and hold the side button until you see the Apple logo.
How do you fix the iPhone’s black screen of death?
A hard reset of your device mostly fixes the iPhone black screen problem. To hard reset your iPhone, do the following:
On iPhone 8 or later – Press the volume up button. Then, quickly press the volume down button. Then, hold down the side button until the Apple logo appears on the screen;
On iPhone 7 and 7 Plus – Hold down the volume down button and the sleep/wake button at once until the Apple logo shows up;
On iPhone 6s or earlier – Press and hold both the sleep/wake button and the home button until the Apple logo appears on the screen;
What steps can I take to preserve my iPhone’s battery life?
iPhone battery draining faster than you’d like? You’re not alone—many users wonder how to squeeze more hours out of a single charge. Here are some straightforward, effective steps to help you extend your battery life and keep your device running longer throughout the day:
- Switch on Optimized Battery Charging: This clever feature ensures your battery isn’t kept at 100% for extended periods, which helps slow down battery wear. Simply head to Settings > Battery > Battery Health & Charging and enable Optimized Battery Charging.
- Embrace Dark Mode: Using dark mode reduces screen energy consumption, especially on OLED screens. Activate it via Settings > Display & Brightness, then select Dark.
- Lower your screen brightness: A bright screen can sap your battery. Swipe down from the top-right corner (on Face ID models) to quickly reduce brightness, or adjust it in Settings > Display & Brightness.
- Tidy up Location Services: Many apps track your whereabouts even when you’re not using them, which drains your battery in the background. Go to Settings > Privacy & Security > Location Services to review and disable location access for apps that don’t need it.
Try these simple tweaks—your battery (and your busy day) will thank you!
How to safeguard your iPhone against Malware and performance issues?
Worried about malware sneaking onto your iPhone or noticing laggy performance? While Apple’s built-in security is robust, a few extra precautions can keep both hackers and hiccups at bay—no advanced tech skills required.
- Update Regularly: Keep your iPhone’s software up to date. Each update patches vulnerabilities that malware could exploit. Head to Settings > General > Software Update to check for the latest version.
- Download Wisely: Only install apps from the official App Store, and steer clear of dubious links, pop-ups, or attachments—malware loves a sneaky backdoor.
- Strengthen Your Privacy: Don’t give apps unnecessary permissions. Review what’s really essential for each app via Settings > Privacy & Security.
- Enable Two-Factor Authentication: Add an extra layer of security to your Apple ID by switching on two-factor authentication in Settings > [your name] > Password & Security.
- Consider Security Apps: Tools like Norton Mobile Security or McAfee Mobile Security offer features like malicious website blocking, Wi-Fi protection, and privacy checks to help you stay a step ahead.
By building these habits into your routine, you’ll not only dodge malware threats but also keep your iPhone running at peak performance—so you can spend less time worrying and more time enjoying your device.
You may also like to read: 5 Easy Steps to Fix iPhone touch screen not working
Conclusion
‘iPhone will not turn on or charge’ is an issue that is not uncommon among iPhone users. If you are not sure about why is my iPhone not turning on or charging, the fixes suggested above should resolve the problem and make your device boot again and work properly in the majority of cases.
However, if your iPhone won’t turn on or charge even after trying the suggested fixes, you have no other option but to contact Apple support.
Apple support would help you to identify why your iPhone won’t switch on and why you see a black screen even after charging and to fix the issue.
But before you contact Apple support you should check the status of your iPhone’s warranty since that could save you money on repairs.
You may also like to read this post: My Apple Watch won’t turn on – here’re 5 best solutions